How To Remove Acrylic Nails Safely At Home: Your Friendly Guide For Today
Finding yourself in a bit of a nail situation, perhaps with acrylics that have seen better days, can be a real bother, especially when getting to a salon isn't an option. You might be wondering, quite honestly, how to remove acrylic nails without causing a mess or, even worse, harming your own natural nails. It's a common worry, and you're definitely not alone in feeling a little stuck, you know? Many people look for ways to take care of their nails at home, and getting those artificial layers off can feel like a big puzzle.
Well, good news! We’ve put together a handy guide to removing acrylic nails, drawing on expert advice to show you the best ways. This means you can free your fingers right at home, and that’s a pretty good feeling, isn't it? Our experts have shared their tips for a safe and quick removal process, so you can get your nails back to neutral without causing any harm.
Removing acrylic nails might seem a bit challenging, but it truly doesn't have to be. With a little patience and the right steps, you can safely remove them yourself. We'll show you how to do it the right way, according to those who really know their stuff, and also what to keep in mind to protect your nails every step of the way, so, just read on for all the details.
- High Potential Season 2
- Lee Lucas From Baton Rouge
- Who Do You Think You Are I Am
- What Is The 4th Hole Slang
- Nicki Minaj Net Worth
Table of Contents
- Why Remove Your Acrylics? Knowing When It's Time
- Getting Ready: What You'll Need for Acrylic Removal
- Method 1: The Acetone Soak (A Common and Effective Way)
- Prepping Your Nails for the Soak
- The Soaking Process: Patience is a Virtue
- Gentle Removal Steps After Soaking
- Method 2: The Hot Water and Oil Approach (A Gentler Alternative)
- Gathering Your Supplies for This Method
- The Warm Bath Technique Explained
- Method 3: Using Dental Floss (A Salon Trick, Use with Care)
- How This Technique Works
- Important Safety Notes for Floss Removal
- Method 4: The Electric Nail Filer (For Experienced Hands Only)
- What to Keep in Mind Before Using One
- Safe Filing Practices
- Protecting Your Natural Nails During Removal
- What to Do After Acrylic Removal: Essential Nail Care Tips
- When to See a Professional for Removal
- Frequently Asked Questions About Acrylic Nail Removal
Why Remove Your Acrylics? Knowing When It's Time
It's really important to know when your acrylics need to come off, you know, for the health of your natural nails. Mazz Hanna, an expert in nail care, points out that "acrylic nails should be removed when you notice lifting, chipping, or peeling." These aren't just cosmetic issues; they can actually trap moisture underneath the acrylic, and that, my friend, could lead to fungal infections. So, if you see any of these signs, it's definitely time to think about removal, perhaps even sooner rather than later.
Leaving lifted or damaged acrylics on for too long can create a perfect little home for bacteria, which is something nobody wants, really. It’s better to be proactive and get them off before any serious problems start. This is, in a way, about being kind to your nails and keeping them healthy. So, pay attention to those signals your nails are giving you.
Getting Ready: What You'll Need for Acrylic Removal
Before you start the process of how to remove acrylic nails, gathering all your supplies makes everything go much smoother, you know? You'll want to have pure acetone on hand, which is pretty much the star of the show for most at-home removals. Cotton balls or cotton pads are also super helpful for soaking. A nail file, both a coarse one and a finer grit, will be necessary for prepping and shaping. You'll also need some aluminum foil, cut into squares, to wrap your fingers.
- Descargar Video De Instagram
- Creme De La Creme
- Valentino Born In Roma
- Salvage Hunters Tee
- Drew Pritchard En La Actualidad
Other useful items include a cuticle pusher, maybe a small bowl for soaking, and some petroleum jelly or cuticle oil to protect your skin. For some methods, you might also want a bit of dental floss, or even some hot water and oil. Having everything within reach means you won't have to stop halfway through, which can be a bit annoying, actually. So, get your little station set up first.
Method 1: The Acetone Soak (A Common and Effective Way)
The acetone soak is probably the most widely known and, frankly, one of the best ways of removing acrylic nails at home, according to experts. It uses pure acetone to break down the acrylic, making it easy to gently slide off. This method is generally safe when done correctly, and it's what many professionals would do, too, if you were in a salon.
Prepping Your Nails for the Soak
First things first, you'll want to carefully clip off the tips of your acrylics, getting them as short as possible without cutting your natural nail, obviously. Then, use a coarse nail file to file down the top layer of the acrylic. You don't need to file all the way through, but just enough to remove the shiny top coat and thin out the acrylic a bit. This helps the acetone work its magic more effectively, so, it’s a pretty important step.
Next, apply some petroleum jelly or a thick layer of cuticle oil around the skin surrounding your nails. Acetone can be very drying, so this creates a protective barrier for your skin. This little step can really make a difference in how your skin feels afterward, you know? It's all about being kind to your hands.
The Soaking Process: Patience is a Virtue
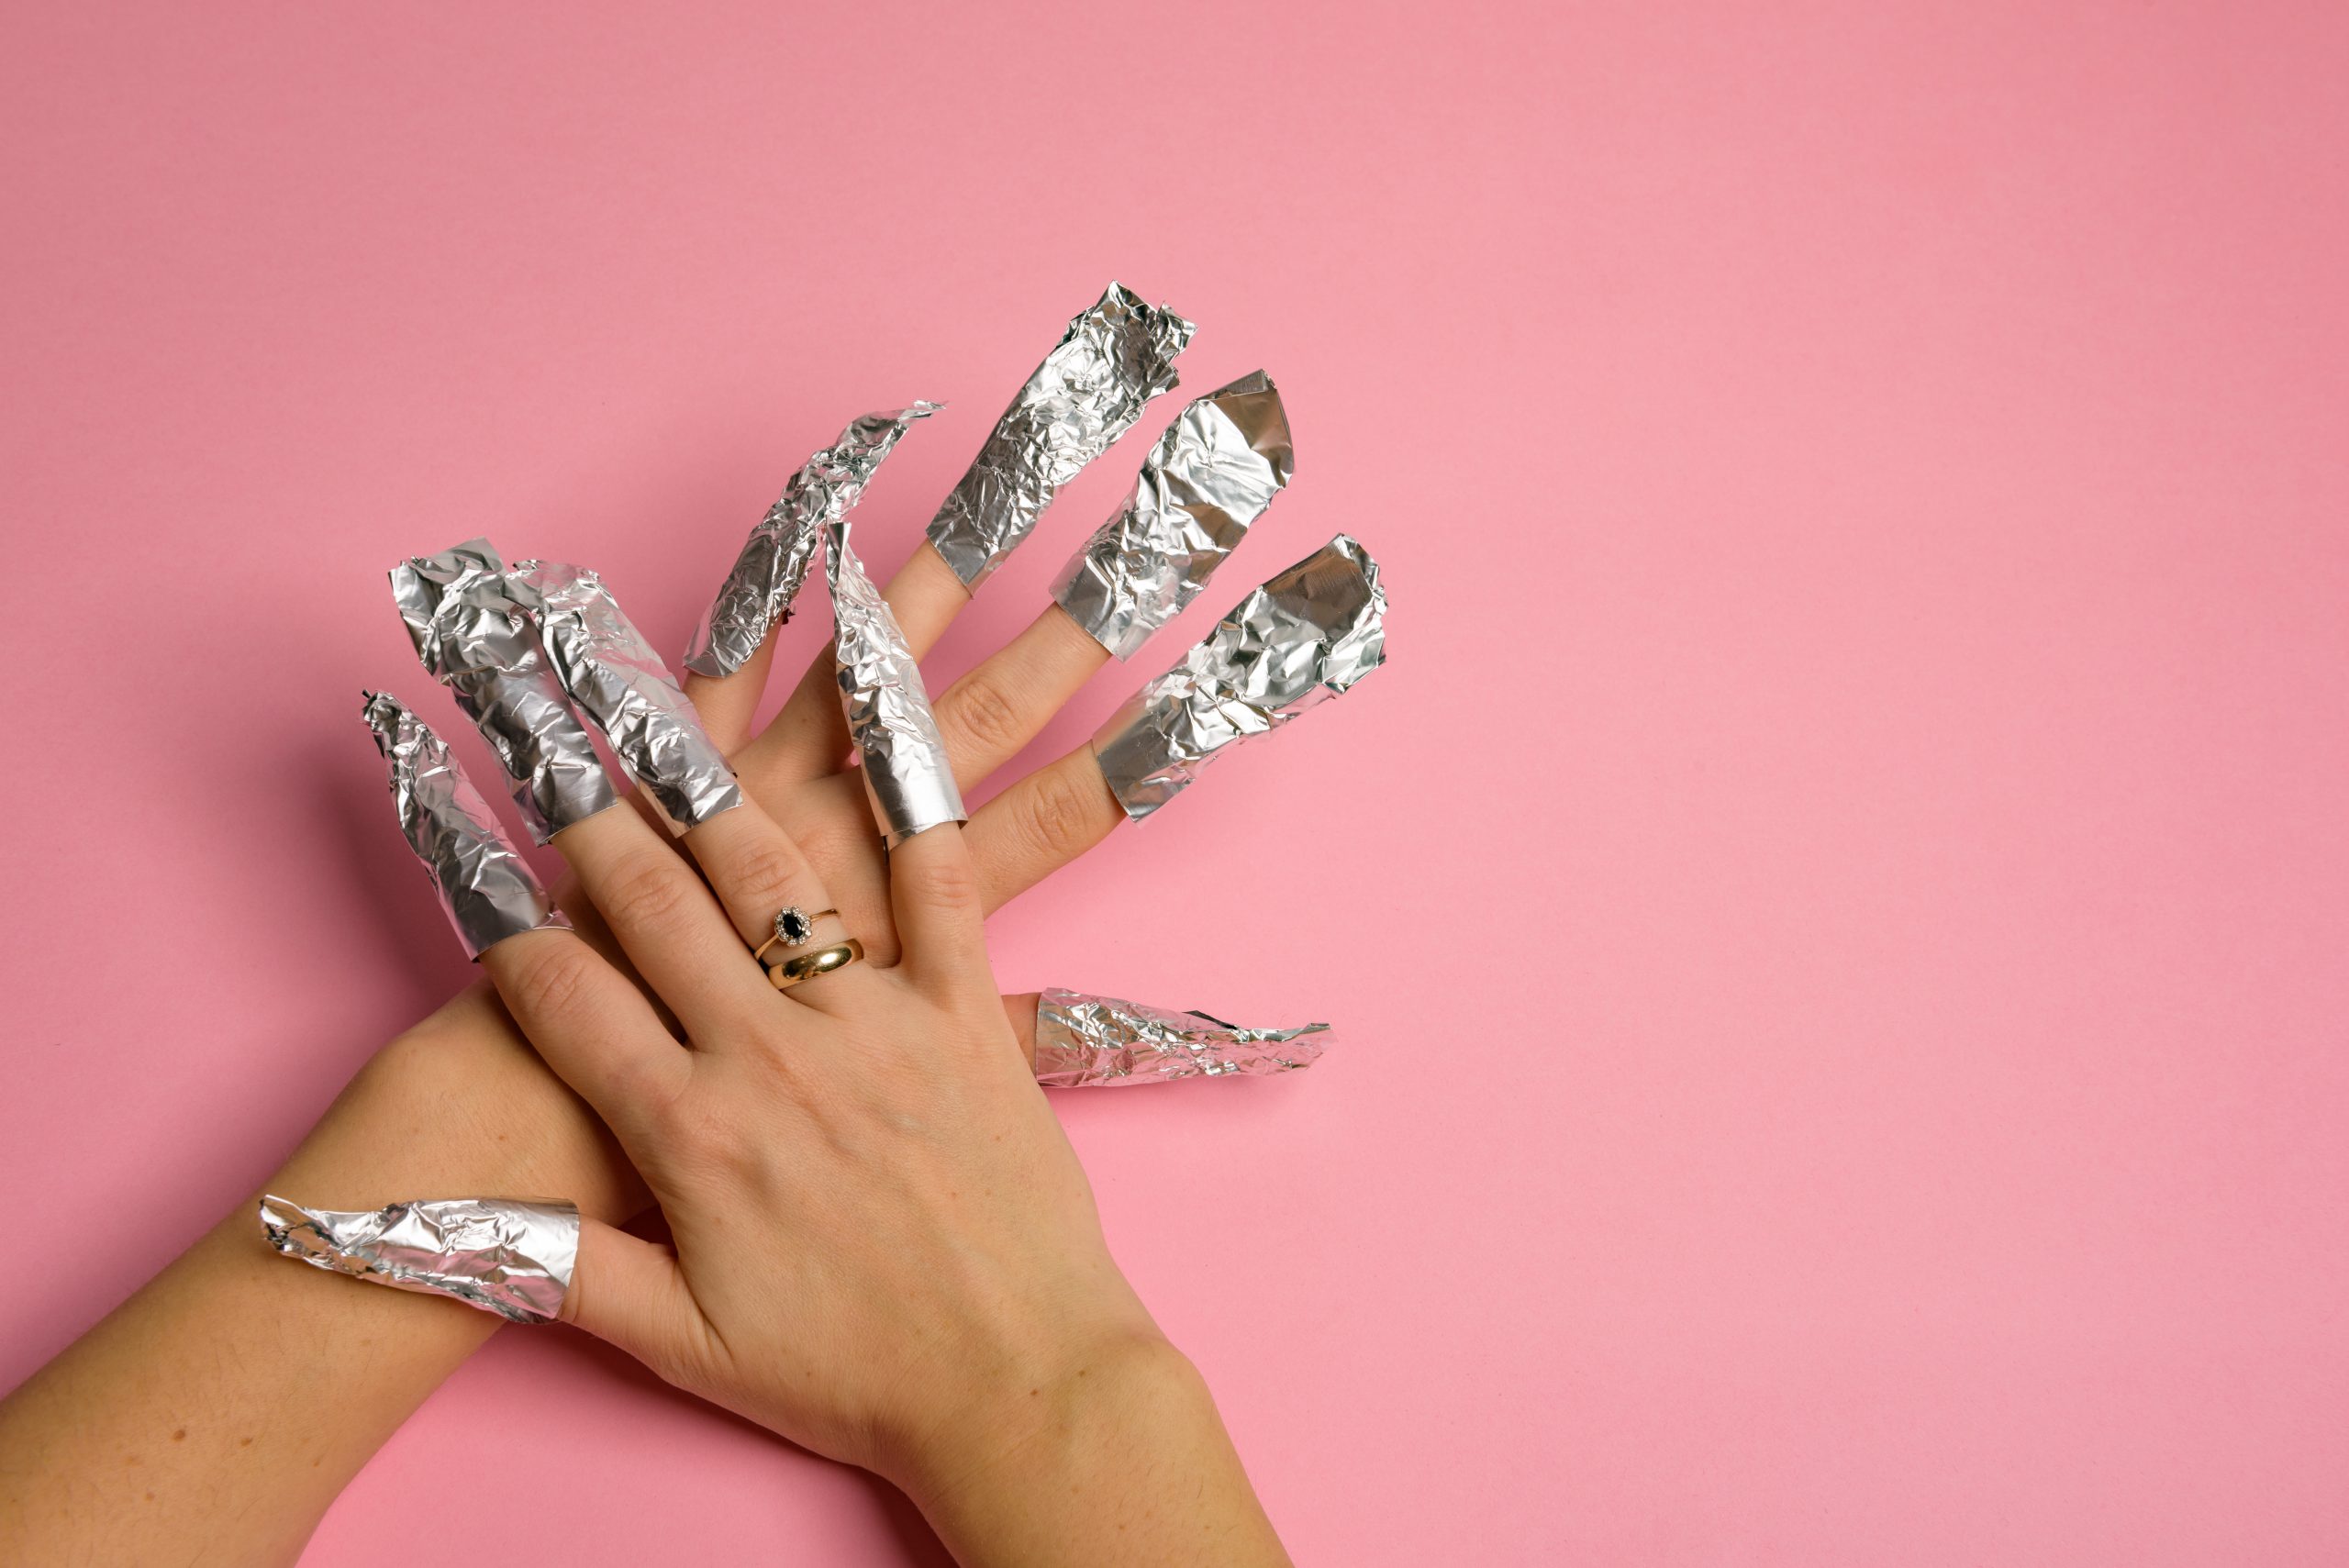
Now, for the soaking part. You have a couple of options here, actually. One way is to soak cotton balls in pure acetone, then place one on each acrylic nail. Secure each cotton ball by wrapping a small piece of aluminum foil tightly around your finger, making a little cap. This keeps the acetone right where it needs to be and prevents it from evaporating too quickly, which is quite clever.
Another approach, if you prefer, is to pour acetone into a small bowl and carefully submerge your fingertips into it. This method can be a bit more intense on the skin, so make sure that petroleum jelly barrier is really strong. Either way, you'll need to let your nails soak for about 20 to 30 minutes. It feels like a long time, but patience is key here, honestly. You might even want to put on a show or listen to a podcast while you wait.
Gentle Removal Steps After Soaking
After the soaking time, the acrylic should feel soft and somewhat gummy. Carefully remove the foil and cotton from one finger. Using a cuticle pusher, gently try to push the softened acrylic off your nail, starting from the cuticle area. It should come off fairly easily, in flakes or chunks, if it's been soaked long enough, you know?
If the acrylic isn't coming off easily, don't force it. That's a really important rule. Just re-soak that nail for another 5 to 10 minutes. Once most of the acrylic is off, use a fine-grit nail file to gently buff away any remaining bits, being very careful not to file your natural nail. Then, give your hands a good wash and get ready for some serious moisturizing.
Method 2: The Hot Water and Oil Approach (A Gentler Alternative)
For those who are a bit hesitant about using pure acetone, or if you just prefer a more natural approach, the hot water and oil method is a really interesting alternative. It's generally gentler on your nails and skin, though it might take a little longer. This method works by helping the acrylic soften and loosen its grip on your natural nail, so, it's quite a different process.
Gathering Your Supplies for This Method
For this method, you'll need a bowl of very warm, almost hot, water – but not so hot that it burns you, obviously. You'll also need a good amount of oil; olive oil, coconut oil, or even baby oil works well. A nail file, a cuticle pusher, and perhaps a towel will also be useful. This is a bit like a spa treatment for your nails, in a way, just without the salon price tag.
Make sure you have a comfortable spot to sit for a bit, as this method does require some dedicated time. Having everything ready before you start will make the experience much more relaxing and effective, you know? It’s pretty much about setting the scene for success.
The Warm Bath Technique Explained
Start by clipping and filing the top layer of your acrylics, just like you would for the acetone method. This helps the warm water and oil penetrate better. Then, pour a generous amount of your chosen oil into the warm water. Stir it gently to combine. Now, submerge your fingers into this warm, oily bath.
You'll need to soak your nails for at least 30 to 45 minutes, or even longer, until you feel the acrylic starting to soften and lift. The warmth and the oil work together to loosen the adhesive bond. Every now and then, you can gently try to wiggle the acrylic to see if it’s loosening. Once it feels pliable, use your cuticle pusher to gently coax the acrylic off. Again, if it resists, just soak a little longer, you know? Forcing it is never a good idea.
Method 3: Using Dental Floss (A Salon Trick, Use with Care)
Using dental floss to remove acrylics is a technique that some experts mention, and it's a bit of a salon trick, honestly. However, it requires a very steady hand and, quite frankly, should be done with extreme caution. This method is not for everyone, and it's probably best if you have someone helping you, too, because it's tricky to do on your own.
How This Technique Works
This method involves getting a piece of dental floss underneath the lifted edge of an acrylic nail. You'll need to have a small gap between your natural nail and the acrylic for this to even be possible. Once the floss is under, you or a helper would gently slide it back and forth, slowly working it down the nail bed to separate the acrylic from your natural nail. It’s a bit like sawing, but very, very gently, you know?
The idea is to break the bond without pulling or tearing your natural nail. This is why it's so important to proceed with the utmost care. It's a method that sounds simple but can actually be quite risky if not done perfectly. So, really think about if this is the right choice for you.
Important Safety Notes for Floss Removal
The biggest risk with the dental floss method is damaging your natural nail. If the acrylic isn't sufficiently lifted, or if you apply too much pressure, you could accidentally pull off layers of your natural nail, which is something you absolutely want to avoid. This can lead to thin, weak, and painful nails, and that's not fun, is it?
Experts generally advise against this method for at-home removal unless you are very confident and have someone experienced helping you. It's much safer to stick to soaking methods that gently dissolve the acrylic. If you do try it, make sure the floss is waxed, as it slides more easily, and always stop if you feel any pain or resistance, you know? Your nail health is paramount.
Method 4: The Electric Nail Filer (For Experienced Hands Only)
An electric nail filer is a tool often used by professional nail technicians to quickly and efficiently remove acrylics. While it might seem like a fast solution, using one at home without proper training can be quite risky. We’ve put together a handy guide to removing acrylic nails with an electric nail filer, but it’s really only for those with a lot of experience, or, frankly, it's best left to the pros.
What to Keep in Mind Before Using One
Electric nail filers are powerful tools, and they can cause significant damage to your natural nails if not used correctly. You could easily file too deeply, creating grooves, thinning your nail plate, or even causing burns from friction. This is why a nail artist and a dermatologist would almost certainly tell you to be very, very careful with these at home. They require a steady hand, knowledge of different drill bits, and an understanding of appropriate speeds, you know?
If you're not absolutely sure about how to use one, it's honestly better to choose one of the soaking methods. The risk of injury or long-term nail damage is simply too high for beginners. It's one of those tools that looks easy but has a bit of a learning curve, actually.
Safe Filing Practices
If you do have experience with an electric nail filer, or if you're a licensed tech doing your own nails, here are some tips. Always start with a coarse bit to gently remove the bulk of the acrylic, keeping the drill moving constantly to avoid heat buildup. Use light pressure, letting the drill do the work, so, don't press too hard. Switch to finer bits as you get closer to your natural nail.
The goal is to thin the acrylic down to a very fine layer, almost like a paper-thin sheet, and then you can often finish with a gentle acetone soak for the last bits. Never file directly onto your natural nail with a coarse bit. Always wear protective eyewear, too, because acrylic dust can be irritating. This is a pretty serious tool, you know, and needs to be treated with respect.
Protecting Your Natural Nails During Removal
Protecting your natural nails is, quite frankly, the most important part of learning how to remove acrylic nails at home without damage. No matter which method you choose, being gentle is key. Always avoid picking, prying, or forcibly pulling off acrylics, as this is how you rip off layers of your natural nail, which is very painful and damaging, you know? Your nails will be weak and thin afterward if you do this.
Using petroleum jelly or cuticle oil around your skin during acetone soaks is also a vital step to prevent excessive dryness. After any removal, immediately apply a good quality nail strengthener or treatment. Also, give your nails a break from any artificial enhancements for a while. This allows them to recover and regain their strength, which is pretty important, honestly.
What to Do After Acrylic Removal: Essential Nail Care Tips
Once those acrylics are off, your natural nails might feel a bit sensitive, or look a little rough, and that's perfectly normal, you know? They've been under wraps for a while. The first thing you should do is gently buff them to smooth out any ridges or remaining acrylic residue. Then, give them a good wash and apply a nourishing cuticle oil to your cuticles and nail beds. This helps with hydration, which is very important.
Next, apply a strengthening base coat or a dedicated nail treatment. You might want to keep your nails short for a few weeks to prevent breakage while they recover. Moisturize your hands and nails regularly with a good hand cream. Also, get tips on how to care for your nails after removal and when to take a break from acrylics. This period of rest is actually crucial for healthy nail growth, so, give them some love!
Consider wearing gloves when doing household chores or washing dishes to protect your recovering nails from harsh chemicals and excessive water exposure. Eating a balanced diet rich in vitamins and minerals, like biotin, can also support strong nail growth from the inside out. Learn more about nail health on our site, and check out this page for more tips on natural nail care.
When to See a Professional for Removal
While learning how to remove acrylic nails at home can be very useful, there are definitely times when seeing a licensed nail technician is the best course of action. If your acrylics are very thick, or if they're particularly stubborn and not softening with home methods, a professional has the tools and expertise to remove them safely. They can assess your nail health and choose the least damaging approach, you know?
Also, if you notice any signs of infection, like redness, swelling, pain, or pus around your nails, do not attempt to remove the acrylics yourself. This is a situation where you absolutely need to see a doctor or a professional nail tech immediately. Your health is more important than a DIY project, honestly. Although it's always ideal to see a licensed nail tech for the safest removal, it's good to know your options.
Frequently Asked Questions About Acrylic Nail Removal
Can I remove acrylic nails without acetone?
Yes, you can, in some respects. As we discussed, the hot water and oil method is a gentler alternative that doesn't use acetone. It works by softening the acrylic and loosening its bond to your natural nail, but it might take a bit more time and patience, you know? Some people also try dental floss, but that really needs a lot of care.
How long does it take to remove acrylic nails at home?
The time it takes to remove acrylic nails at home can vary quite a bit, actually, depending on the method you choose and how thick your acrylics are. The acetone soak method typically takes about 30 to 45 minutes of active soaking and gentle removal. The hot water and oil method might take a little longer, perhaps 45 minutes to an hour or more, you know, because it's a gentler process. It's not a super quick thing, so plan accordingly.
What are the risks of removing acrylic nails at home?
The main risks of removing acrylic nails at home include damaging your natural nails by prying or forcing the acrylic off, which can lead to thinning, breakage, or even infection. Acetone can also be very drying to your skin and cuticles if you don't protect them properly, you know? Using tools like electric nail filers without proper training carries a high risk of injury. It's really about being careful and following the steps correctly.
- Meaning Of Am Pm In Time
- Shu Jiao Fu Zhou
- Fast And Furious Suki
- Voice For Optimus Prime Transformer Movie
- 10 Sibling Entire Wayans Brothers Family
3 Methods to Remove Acrylic Nails Without Damaging Your Nails
How to Remove Acrylic Nails at Home

3 Ways to Remove Acrylic Nails - wikiHow
