How To Take A Screenshot On PC: Your Easy Guide For Windows 10 And 11
Have you ever needed to quickly grab what's on your computer screen? Maybe you want to show someone something specific, like a funny error message, or perhaps you need to save a receipt from an online purchase. Whatever the reason, knowing how to take a screenshot on your PC is a really important skill, and it's something every computer user should feel comfortable doing, you know.
It's actually pretty common to need to capture your screen, and the good news is that for anyone using a Windows computer, whether it's Windows 10 or the newer Windows 11, there are several simple and quick ways to get the job done. You might want to capture the whole screen, or just a specific window, or maybe even a tiny part of what you're looking at. Windows has some handy tools and keyboard shortcuts that make snapping these pictures a real breeze, actually.
This guide will walk you through all the different approaches, from basic keyboard presses to more advanced, built-in applications. We'll show you how to easily capture your screen, so you can master this super useful skill. It's perfect for beginners, and it will help you feel much more confident with your PC, so you can share feedback, demonstrate a process, or just save something for later, you know.
- Huge And Natural Boobs
- 10 Sibling Entire Wayans Brothers Family
- Kanye West And Bianca Censori
- How Many 0 For Billion
- Lia Engel Leaks
Table of Contents
Why Screenshots are So Useful
Quick Ways to Take a Screenshot on PC
Using the Print Screen Key (PrtSc)
Windows Key + Print Screen (Win + PrtSc)
The Snipping Tool (Windows 11 and 10)
Snip & Sketch (Mainly Windows 10)
Xbox Game Bar
Saving, Editing, and Sharing Your Screenshots
Frequently Asked Questions About Screenshots
Making the Most of Your Screen Captures
Why Screenshots are So Useful
Screenshots are, in some respects, a pretty big deal for daily computer use. They let you take a picture of exactly what you see on your display at any given moment. This can be for a lot of different reasons, you know. Maybe you're trying to explain a tricky computer problem to a friend or support person, and a picture really does tell a much clearer story than words alone. Or, perhaps you found a cool recipe online and want to save it quickly without copying all the text.
People often use screenshots to show what they're working on, to gather ideas, or even to mark something for later review. For students, it's a way to keep notes from online lectures or articles. For professionals, it helps with project feedback or creating guides. It's a way to document things, which is actually quite helpful, so it's a skill worth picking up.
Quick Ways to Take a Screenshot on PC
Windows 10 and Windows 11 both offer a variety of straightforward ways to grab a picture of your screen. You don't need any special software to start, which is nice. These built-in options are often all you'll ever need, so let's check them out.
- Canon G7x Mark Iii
- Red Hot Chili Anthony Kiedis
- Nicki Minaj Net Worth
- Bengali Viral Mms
- What Is The Healthiest Energy Drink
Using the Print Screen Key (PrtSc)
The Print Screen key, often labeled "PrtSc," "PrntScrn," or "Print Scrn," is probably the oldest and most basic way to take a screenshot on your PC. You'll usually find it near the top right of your keyboard, often close to the F12 key or the Scroll Lock key. It's a simple press, and it does something quite useful, you know.
When you press the PrtSc key by itself, your computer actually takes a picture of your entire screen and copies it to your clipboard. Think of the clipboard as a temporary holding area for things you've copied. It doesn't automatically save the image as a file, which is something to remember. After pressing it, you'll need to paste that image somewhere, so a bit of a next step is involved.
To use this screenshot:
- Press the PrtSc key. Nothing might seem to happen, but the image is there.
- Open an image editing program like Paint, or even a document like Word or a new email.
- Press Ctrl + V (the paste shortcut) to put your screenshot into the program.
- From there, you can edit it, save it as a file (like a JPG or PNG), or share it.
Now, if you only want to capture the active window – that's the window you're currently working in – you can use a slight variation. Press Alt + PrtSc at the same time. This will copy just that one window to your clipboard, leaving out everything else on your desktop. It's a rather handy trick for focusing on just one application.
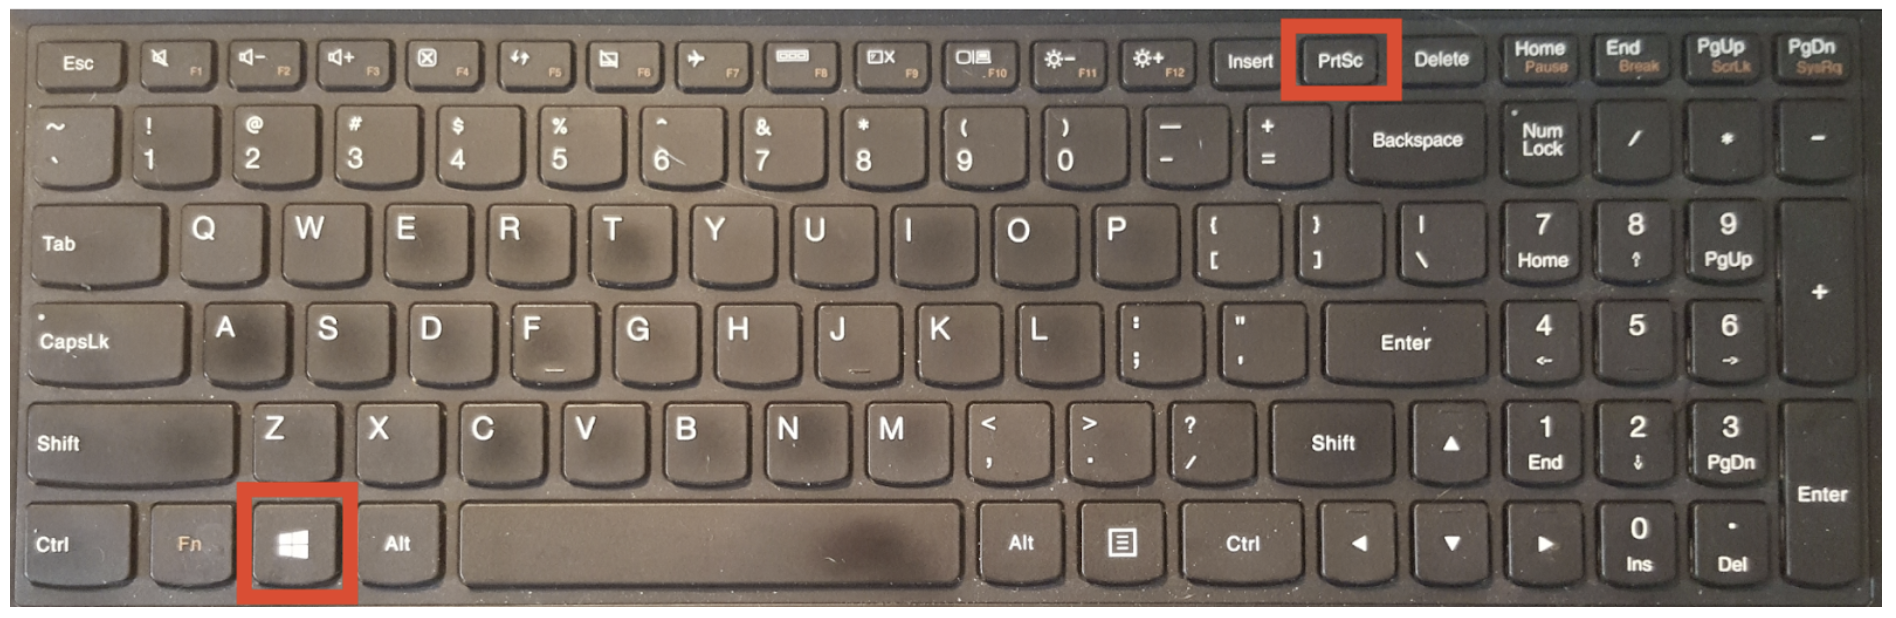
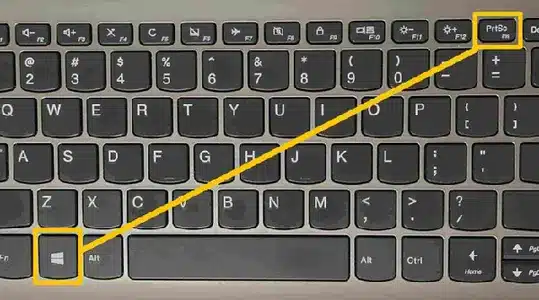
Windows Key + Print Screen (Win + PrtSc)
This method is a step up from just the PrtSc key because it automatically saves your screenshot as a file. It's a favorite for many people because it's so quick and easy. You just press two keys together, and the job is pretty much done, you know.
To capture your entire screen and save it automatically:
- Press the Windows key (the one with the four squares) and the PrtSc key at the same time.
- Your screen might dim for just a moment, which tells you the screenshot has been taken.
- The image is then automatically saved as a PNG file.
The Snipping Tool (Windows 11 and 10)
The Snipping Tool is a much more versatile option for taking screenshots. It's built right into Windows, and it gives you a lot more control over what you capture. In Windows 11, it's actually been updated quite a bit, even letting you record video, which is pretty neat. But for screenshots, it's truly a powerhouse.
There are a few ways to open the Snipping Tool:
- Type "Snipping Tool" into the Windows search bar and click on the app.
- The quickest way is to press Windows key + Shift + S. This keyboard shortcut will immediately dim your screen and bring up a small toolbar at the top of your display.
- Rectangular Snip: This is the default. You click and drag your mouse to draw a box around the exact area you want to capture.
- Free-form Snip: This lets you draw any shape you like around an object. It's good for capturing irregular shapes, you know.
- Window Snip: With this, you just click on any open window, and it will capture that entire window.
- Full-screen Snip: This will take a picture of your whole screen, just like the Win + PrtSc method.
After you make your selection, the captured image will appear as a small notification in the bottom right corner of your screen. If you click on this notification, it will open the Snipping Tool's editing window. Here, you can do some basic edits like drawing on the screenshot with a pen or highlighter, or cropping it a little. You can then save your screenshot as a PNG, JPG, or GIF file, or copy it to your clipboard to paste somewhere else. It's a very flexible tool, so you can really get just what you need.
Snip & Sketch (Mainly Windows 10)
For those still on Windows 10, or if you prefer it, Snip & Sketch is quite similar to the Snipping Tool. In fact, in Windows 11, the Snipping Tool essentially took over and combined the best features of Snip & Sketch. However, if you're on Windows 10, you'll likely use Snip & Sketch quite a bit, you know.
You can access Snip & Sketch in a few ways:
- Search for "Snip & Sketch" in the Windows search bar.
- Just like the Snipping Tool, the Windows key + Shift + S shortcut will bring up the Snip & Sketch toolbar directly.
Xbox Game Bar
While the Xbox Game Bar is mostly for gamers, it can also take screenshots of your desktop or any active application. It's actually a pretty quick way to grab a picture, especially if you're already using it for other things, you know.
To use the Xbox Game Bar for screenshots:
- Press Windows key + G to open the Game Bar.
- Look for the "Capture" widget. It usually has a camera icon.
- Click the camera icon within the Capture widget.
- The screenshot will be taken and saved automatically.
Saving, Editing, and Sharing Your Screenshots
Once you've taken a screenshot, what's next? Well, you usually want to save it, maybe make some changes, and then share it with someone. Luckily, Windows gives you plenty of ways to do all of that, you know. It's all pretty straightforward.
Saving Your Screenshots:
- Automatic Saves: Methods like Windows key + PrtSc and the Xbox Game Bar save your screenshots automatically to your Pictures/Screenshots or Videos/Captures folders, respectively. This is super handy, as you don't have to think about it.
- Manual Saves: For screenshots taken with just the PrtSc key, or if you've edited one in the Snipping Tool or Snip & Sketch, you'll need to manually save it. Just go to "File" then "Save As" in the app you're using (like Paint or the Snipping Tool). You can choose where to save it and what file type (PNG, JPG, GIF are common).
Editing Your Screenshots:
- Built-in Tools: The Snipping Tool and Snip & Sketch have basic editing features. You can draw, highlight, or crop right there. This is often enough for simple tasks, you know.
- Paint: This classic Windows app is great for more detailed edits. You can paste your PrtSc captures here and then add text, shapes, or even combine multiple images. It's very versatile for basic image work.
- Other Image Editors: If you need something more powerful, there are many free and paid image editing programs out there. Some people might use tools like GIMP or even more advanced options for really specific needs.
Sharing Your Screenshots:
- Copy and Paste: After taking a screenshot (especially with just PrtSc or Alt + PrtSc), it's on your clipboard. You can paste it directly into emails, chat applications, or documents. This is probably the fastest way to share, actually.
- Attach as File: If you've saved your screenshot as a file, you can attach it to an email, upload it to a cloud storage service, or share it through messaging apps just like any other picture.
Frequently Asked Questions About Screenshots
It's pretty normal to have a few questions about screenshots, especially when you're just getting started. Here are some common things people ask, you know.
How do I take a screenshot on my computer without a Print Screen key?
That's a good question, as some smaller keyboards or laptops might not have a dedicated Print Screen key. The best way to take a screenshot on your PC without that key is to use the Snipping Tool with the Windows key + Shift + S shortcut. This works really well and gives you more control over what you capture. You can also open the Snipping Tool by searching for it in the Start menu. Alternatively, the Xbox Game Bar (Windows key + G) can also take screenshots, so you have options.
Where do screenshots go on Windows?
It depends a little on how you take the screenshot, you know.
- If you use Windows key + PrtSc, the screenshots are automatically saved as image files in your "Pictures" folder, inside a subfolder called "Screenshots."
- If you use the Xbox Game Bar, your captures usually end up in your "Videos" folder, in a subfolder named "Captures."
- When you use just the PrtSc key, the image goes to your clipboard, not a file. You need to paste it into an app like Paint or Word and then save it yourself.
- Screenshots taken with the Snipping Tool or Snip & Sketch will appear in the app itself, where you can then choose to save them to any folder you like.
Can I edit a screenshot after taking it?
Absolutely, you can! Most methods offer some kind of editing, you know.
- The Snipping Tool and Snip & Sketch both let you do basic edits like drawing, highlighting, and cropping right within their applications after you take the picture.
- For screenshots copied to your clipboard (like from just pressing PrtSc), you can paste them into Microsoft Paint. Paint offers a wide range of simple editing tools, like adding text, drawing shapes, or resizing the image.
- If you need more advanced editing, there are many other image editing programs available, both free and paid, that can open and modify your saved screenshot files.
Making the Most of Your Screen Captures
Knowing how to take a screenshot on your PC is, like, a really useful everyday skill. Whether you're using Windows 10 or Windows 11, there are plenty of easy ways to grab what you need from your screen. From the simple Print Screen key to the more versatile Snipping Tool, you have options for capturing the whole screen, a specific window, or just a custom area, you know. It's all about finding the method that works best for what you're trying to do at that moment.
These different approaches mean you can quickly show someone exactly what you mean, keep records of important information, or even just save something interesting you found online. It's a skill that makes your computer use a bit smoother, and it helps you communicate better. So, go ahead and give these methods a try. Practice makes perfect, and you'll find yourself snapping screenshots like a pro in no time, you know.
If you're looking for more ways to make your Windows experience even better, you can learn more about productivity tips on our site. Also, check out our page on keyboard shortcuts for Windows to speed up your daily tasks even more. For additional details on advanced screenshot features and tools, you might find some useful information on the official Microsoft Support website for the Snipping Tool.
- Short Cut Style For Women
- Huge And Natural Boobs
- Nba 2k25 Locker Codes
- John Tee Artist
- What Does 67 Mean In Slang
How to Take a Screenshot in Windows 10 (+ Windows 8 and 7)
How to Take a Screenshot on Windows (Updated 2025)

What Is the Best Way to Take Xbox Screenshots on PC?
