How To Make Fried Pickles: Your Guide To Crispy, Golden Perfection
Craving a crunchy, tangy snack that’s completely addictive, that, is that? You are in for a real treat today, because learning how to make fried pickles at home means you get to enjoy that amazing restaurant taste whenever you want. These deep fried pickles are sure to become your new favorite appetizer, honestly. They offer that perfect balance of a satisfying crunch and a delightful tang, a bit like a culinary hug, you know?
Perfectly seasoned, coated in a light, golden batter, and then fried to an irresistible crispiness—these bites make the best kind of party food. So, whether you are making them as a side dish for your next barbecue or as the star delicious appetizer for your weekend gathering, this recipe is your ticket to crispy, golden brown perfection that will have everyone asking for the secret. My family loves these fried pickles, and I bet yours will too.
Fried pickles are a beloved Southern snack, as a matter of fact, and they truly hit the spot. Each dill pickle slice gets a coating in a flavorful blend of flour and cornmeal, then it is fried to golden perfection for a crispy bite that’s irresistible. Served with a cool ranch dip or spicy mayo, they make the ultimate appetizer or party snack, especially popular for game days, gatherings, or just a cozy night in, you know.
- Remote Iot Platform Ssh Key Raspberry Pi
- How Tall Is Benson Boone
- Bulgarian Split Squat Form
- Cách Tạo Tài Khoản Flow
- Jayshree Gaikwad Web Series
Table of Contents
- Why Make Fried Pickles at Home?
- What You Will Need
- Getting Your Pickles Ready
- The Three-Step Coating Process
- Frying Your Pickles to Golden Perfection
- Serving Your Homemade Fried Pickles
- Tips for the Best Fried Pickles
- Frequently Asked Questions About Fried Pickles
- Your Next Favorite Snack
Why Make Fried Pickles at Home?
Making fried pickles at home gives you complete control over the taste and the texture, so it is a really good idea. You can adjust the seasonings, choose your favorite pickles, and get them just as crispy as you like, you know. This recipe is simple and easy to follow, and you will be enjoying these tasty treats in no time, honestly. It is a fairly easy process if you have ever fried anything before, so don't worry too much.
Plus, there is something truly satisfying about creating a restaurant-quality snack right in your own kitchen, as a matter of fact. These pickles are as simple as it gets, you know. You just need four ingredients (if you count water), and they fry up golden, crisp, and light enough to let the pickle shine. It is a very rewarding experience, actually.
What You Will Need
To get started on your fried pickle adventure, it is good to have all your supplies ready. Here is what you will want on hand so you can get started, so you know. Gathering everything before you begin really helps the process go smoothly, you know, and makes cooking more enjoyable.
- Salvage Hunters Tee
- Thundr Omegle
- Sophie Rain Spiderman Video Tutorial
- Hannah Einbinder Partner
- Lia Engel Leaks
Ingredients for Your Crispy Fried Pickles
The beauty of this recipe is its simplicity, you know. You do not need a long list of fancy items to create something truly delicious. The core ingredients are quite basic, actually, which makes this a very approachable recipe for anyone.
- **Pickles:** Use good quality dill pickle slices or spears. The "My text" suggests that the right type of pickle is important, so choose ones that have a good flavor and are firm.
- **Flour:** All-purpose flour forms the base of your coating.
- **Cornmeal:** This adds a wonderful crunch and that classic fried pickle texture.
- **Seasonings:** Think salt, black pepper, garlic powder, onion powder, and a touch of paprika for color and flavor. You can adjust these to your liking, of course.
- **Buttermilk:** This is key for tenderizing and helping the coating stick.
- **Canola Oil:** Or another neutral oil suitable for frying.
Kitchen Tools You Might Want On Hand
Having the right tools makes a big difference, you know. You do not need anything super specialized, but these items will certainly help. They make the steps much easier, actually, and help ensure a better result.
- **Paper towels:** For drying your pickles. This step is super important, so.
- **Shallow dishes or bowls:** Three of them for your dredging station.
- **Tongs:** For moving pickles between mixtures and into the oil.
- **Deep pot or Dutch oven:** For frying.
- **Slotted spoon or spider:** For removing fried pickles from the oil.
- **Wire rack:** Set over paper towels for draining excess oil.
- **Thermometer:** A deep-fry thermometer helps keep your oil at the right temperature.
Getting Your Pickles Ready
The first and perhaps most important step for crispy fried pickles is making sure your pickles are dry, you know. "My text" highlights that once you have dried off your pickles, the process is pretty straightforward. Excess moisture on the pickles can lead to a soggy coating, and nobody wants that, so.
To dry them, simply lay your pickle slices or spears out on a few layers of paper towels. Then, gently blot them with more paper towels from above, you know. You really want to get as much liquid off them as possible. Let them sit for a little while, perhaps 10-15 minutes, to air dry even more. This small effort makes a huge difference in the final crispiness, honestly.
The Three-Step Coating Process
This is where the magic happens, you know. The coating process is a sequence of steps that builds up that wonderful crispy exterior. It is a bit like an assembly line, actually, and keeping things organized helps a lot.
Step One: The Seasoned Flour Mixture
First, you will prepare your dry seasoning blend. In a shallow dish, combine your all-purpose flour and cornmeal, so. Then, add your chosen seasonings, like salt, pepper, garlic powder, onion powder, and paprika. Give it a good whisk to make sure everything is evenly distributed, you know. This mixture provides the initial flavor and a base for the buttermilk to cling to, basically.
The "My text" mentions adding the pickles to the seasoned flour mixture first, which is a key step. You want each pickle piece to get a good, light dusting of this flavorful blend, you know. It is the first layer of that delicious crunch, after all.
Step Two: The Buttermilk Bath
Next, you will need another shallow dish for your buttermilk. Pour in enough buttermilk to easily coat your pickle pieces, you know. Buttermilk is a fantastic ingredient here because its acidity helps tenderize the pickles a tiny bit, and its thickness really helps the breadcrumbs stick, so.
After dusting the pickles in the seasoned flour, you then add them to the buttermilk mixture, as "My text" says. Make sure each pickle gets fully submerged and coated. Let any excess drip off before moving to the next step, you know, because too much liquid can make the breading messy.
Step Three: The Final Breadcrumb Coat
Finally, you will prepare your breadcrumbs in a third shallow dish. You can use plain breadcrumbs or panko breadcrumbs for an extra crispy result, you know. The "My text" says to finally coat them in breadcrumbs, which is the last layer of that wonderful texture.
Take each buttermilk-coated pickle and press it gently into the breadcrumbs, ensuring a complete and even coating. You really want to make sure every surface is covered, you know, for maximum crispiness. Once they are breaded, they are ready for frying, basically.
Frying Your Pickles to Golden Perfection
Frying is where these pickles transform into that irresistible snack we all love, you know. It is a quick process, but getting the oil temperature right is pretty important, so. This will be a fairly easy process if you have ever fried anything before, honestly.
Choosing Your Oil
The "My text" suggests frying in canola oil, which is a great choice. Canola oil has a high smoke point and a neutral flavor, so it will not overpower the taste of your pickles. Other good options include vegetable oil or peanut oil, you know. Just make sure you have enough oil to submerge your pickles completely, or at least mostly.
Heat your chosen oil in a deep pot or Dutch oven over medium-high heat. You are aiming for a temperature of around 350-375°F (175-190°C), you know. A deep-fry thermometer is really helpful here to keep the temperature consistent, as a matter of fact.
The Frying Process
Once your oil is hot, it is time to fry! "My text" advises frying in small batches. This is a very important tip, honestly. Overcrowding the deep fryer can drop the oil temperature too much, which leads to soggy, greasy pickles instead of crispy ones, so.
Carefully place a few breaded pickles into the hot oil using tongs. Let them fry for about 2-3 minutes, or until they are golden brown and look wonderfully crispy, you know. Keep an eye on them, as they can brown quickly. Use a slotted spoon or spider to remove them from the oil.
Place the fried pickles on a wire rack set over paper towels. This allows any excess oil to drain off, keeping them crisp, so. Repeat with the remaining pickles, making sure the oil comes back up to temperature between batches, you know. This ensures every pickle gets that perfect golden finish.
Serving Your Homemade Fried Pickles
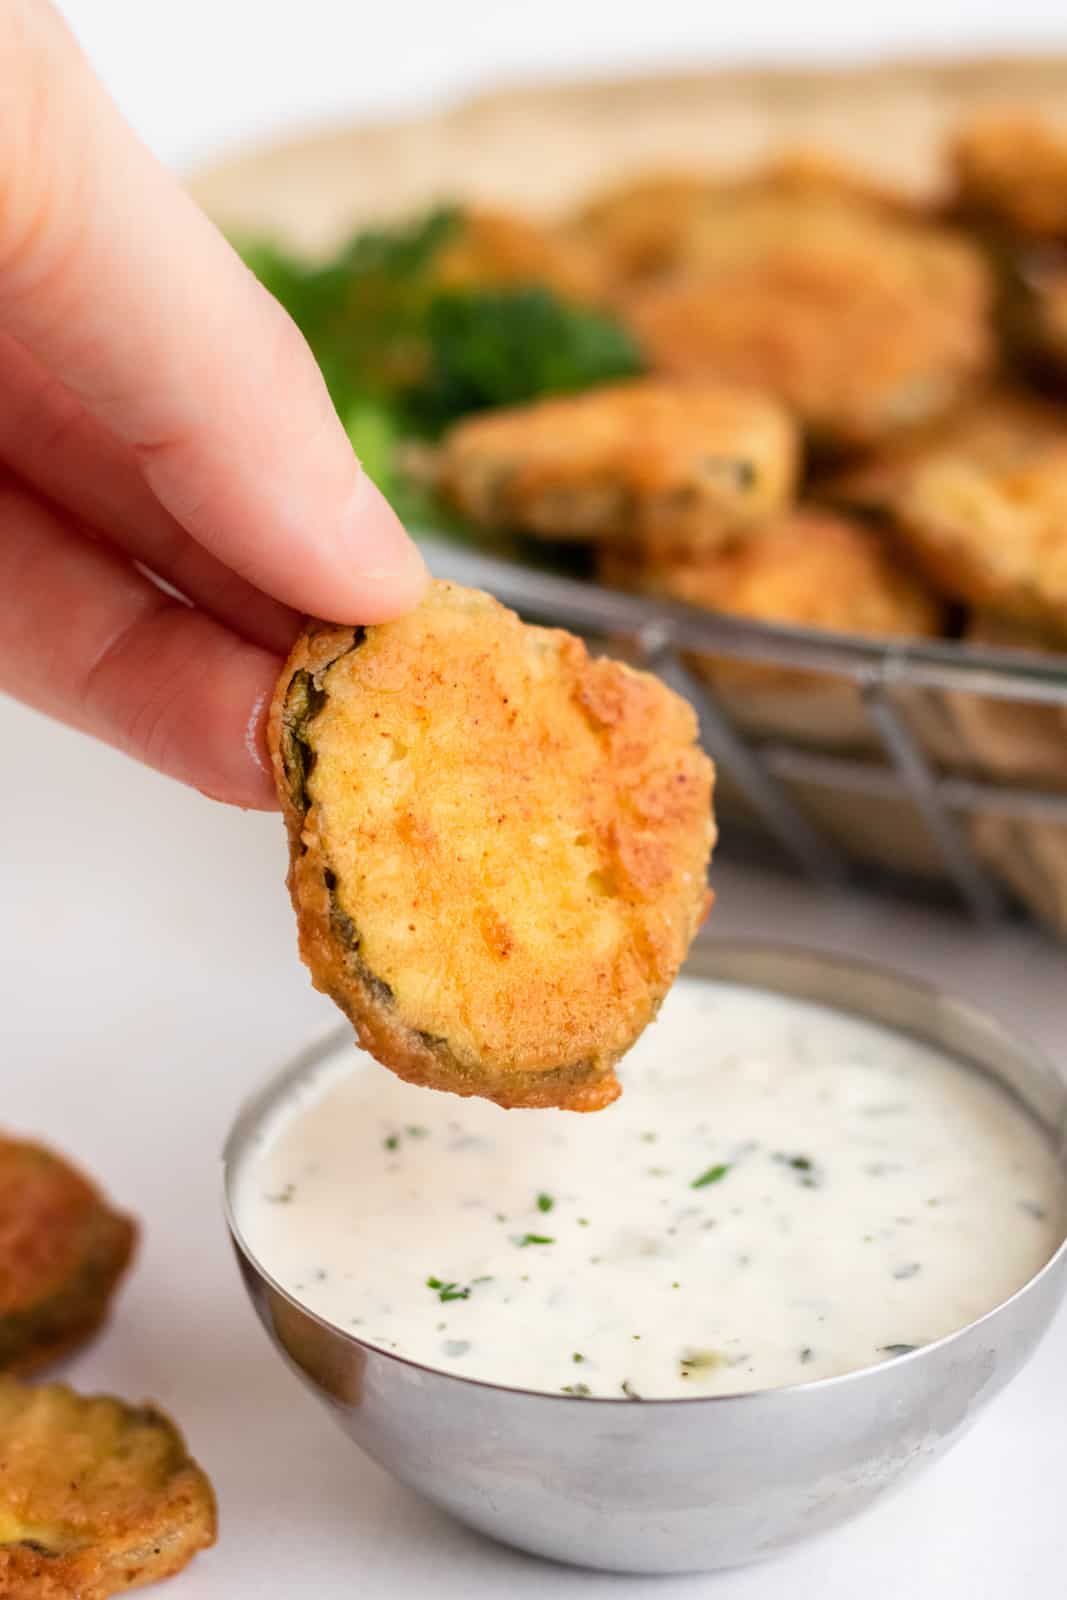
Once all your pickles are fried, they are best served immediately, you know, while they are still warm and at their crispiest. These pickles are as simple as it gets, and they are ready to be enjoyed. The "My text" mentions that these pickles are light enough to let the pickle shine, which is exactly what you want.
They are fantastic on their own, but they are also wonderful with a dipping sauce, you know. A cool ranch dip is a classic pairing, or you could try a spicy mayo for a bit of a kick. Learn more about appetizer ideas on our site, and link to this page our best dipping sauces for more inspiration. You can also find some great ranch dressing recipes at Allrecipes, for example.
Tips for the Best Fried Pickles
To ensure your fried pickles turn out amazing every time, keep these points in mind, you know. The "My text" says, "Remember to use the right type of pickle, dry the pickles, and don’t overcrowd the deep fryer," which are all really good pieces of advice, so.
- **Pickle Choice:** Use firm, good-quality dill pickles. Slices tend to fry up more evenly and get crispier than spears, but spears are fun for dipping, too.
- **Dry, Dry, Dry:** This cannot be stressed enough, honestly. Patting your pickles very dry is the secret to a truly crispy coating.
- **Oil Temperature:** Keep your oil at the correct temperature. Too cool, and the pickles absorb too much oil; too hot, and the coating burns before the pickle is heated through.
- **Small Batches:** This helps maintain oil temperature and ensures even cooking for all your pickles, you know.
- **Seasoning:** Do not be shy with the seasonings in your flour mixture. This is where a lot of the flavor comes from, so.
- **Drain Well:** Always drain fried items on a wire rack to prevent them from getting soggy from residual oil.
Frequently Asked Questions About Fried Pickles
People often have questions when they are making fried pickles for the first time, you know. Here are some common ones that might come up, so.
Why are my fried pickles soggy?
Your fried pickles might be soggy for a few reasons, you know. The most common one is that the pickles were not dry enough before coating. Any excess moisture can make the breading soft. Also, overcrowding the frying pot can lower the oil temperature, causing the pickles to absorb too much oil instead of getting crispy, as a matter of fact. Make sure to fry in small batches and keep your oil hot, you know.
Can I make fried pickles in an air fryer?
Yes, you can actually make a version of fried pickles in an air fryer, you know, for a lighter option. The texture will be a bit different; they will be crispy but not quite as deep-fried crispy as traditional ones. You would typically spray them with a little oil before air frying to help with browning and crispiness, so. The cooking time will vary depending on your air fryer model, but it is a good alternative.
What is the best type of pickle for frying?
The best type of pickle for frying is generally a good quality dill pickle, you know. Look for ones that are firm and have a good, tangy flavor. Both slices and spears work well, but slices tend to get a bit crispier because they have more surface area to coating ratio, so. Avoid overly soft or mushy pickles, as they will not hold up well during frying, basically.
Your Next Favorite Snack
By following the steps outlined in this article, you can make delicious fried pickles that are perfect for snacking or as a side dish, you know. This fried pickle recipe is your ticket to crispy, golden brown perfection that will have everyone asking for the secret, honestly. They fries up golden, crisp, and light enough to let the pickle shine, so.
So, why not give it a try today? Gather your ingredients, get ready to fry, and enjoy the amazing taste of homemade fried pickles. They are a wonderful treat for any occasion, as a matter of fact, and so simple to create. You will be enjoying these tasty treats in no time, you know.
- How To Make An Ender Chest
- Missouri Star Quilt Company
- How To Craft A Saddle In Minecraft
- Red Hot Chili Anthony Kiedis
- Bhad Bhabie Net Worth

Crispy, Cajun Air Fried Pickles | Airfried.com
Fried Pickles - Tornadough Alli

Best Fried Pickles Recipe - Top Recipes
